Last updated: January 15, 2026
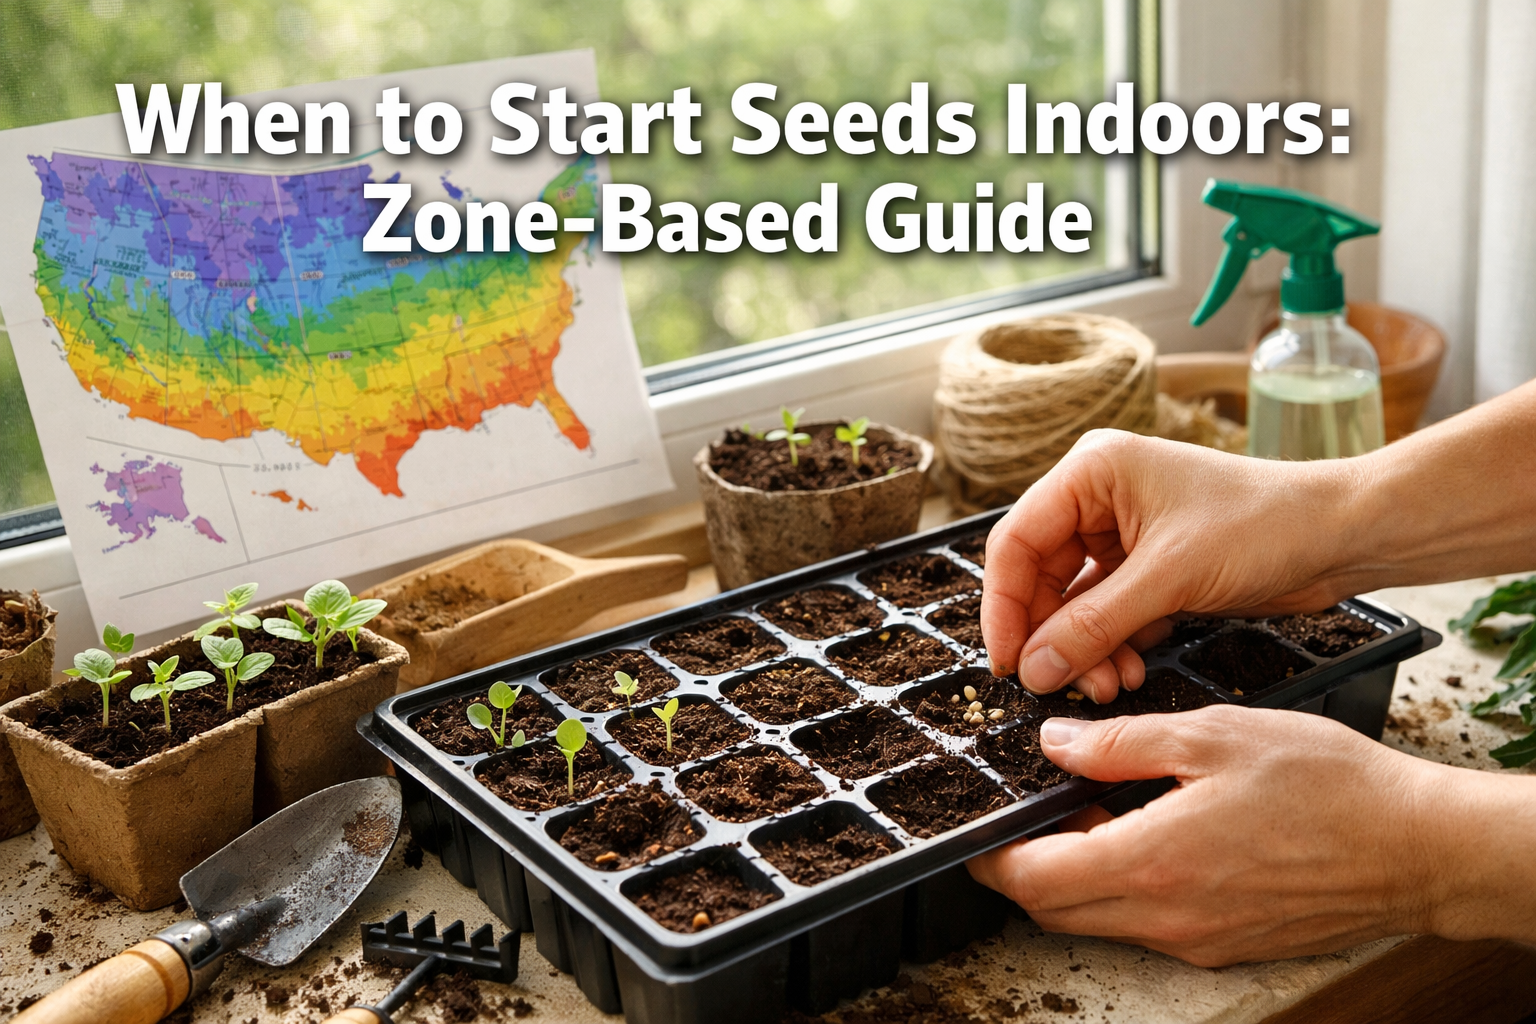
Have you ever stared at a packet of tomato seeds in January, wondering if it’s too early to start dreaming of summer harvests? I’ve been there too, and I’ll tell you what I’ve learned: timing your indoor seed starting correctly can make the difference between thriving transplants and disappointing failures. Understanding when to start seeds indoors using a zone-based guide takes the guesswork out of gardening and sets you up for success from the very beginning.
Key Takeaways
• Calculate backward 6-8 weeks from your area’s average last frost date rather than relying solely on your USDA zone number
• Warm-season crops like tomatoes and peppers need to start indoors 8-10 weeks before your last frost, while cool-season crops like lettuce can start just 4-6 weeks prior
• Seeds require more warmth to germinate than established plants need to grow, making proper indoor conditions essential
• After two weeks, seedlings need full light as much as warmth, often requiring a move from windowsill to better lighting
• Zone-specific timing varies significantly even within the same USDA zone due to local microclimates and elevation differences
Quick Answer
The best time to start seeds indoors depends on your specific location’s average last frost date, not just your USDA zone. Count backward 6-8 weeks from that date for warm-season crops like tomatoes and peppers, or 4-6 weeks for cool-season vegetables like lettuce and broccoli. Even within the same zone, timing can vary by several weeks based on your exact location and local conditions[1].
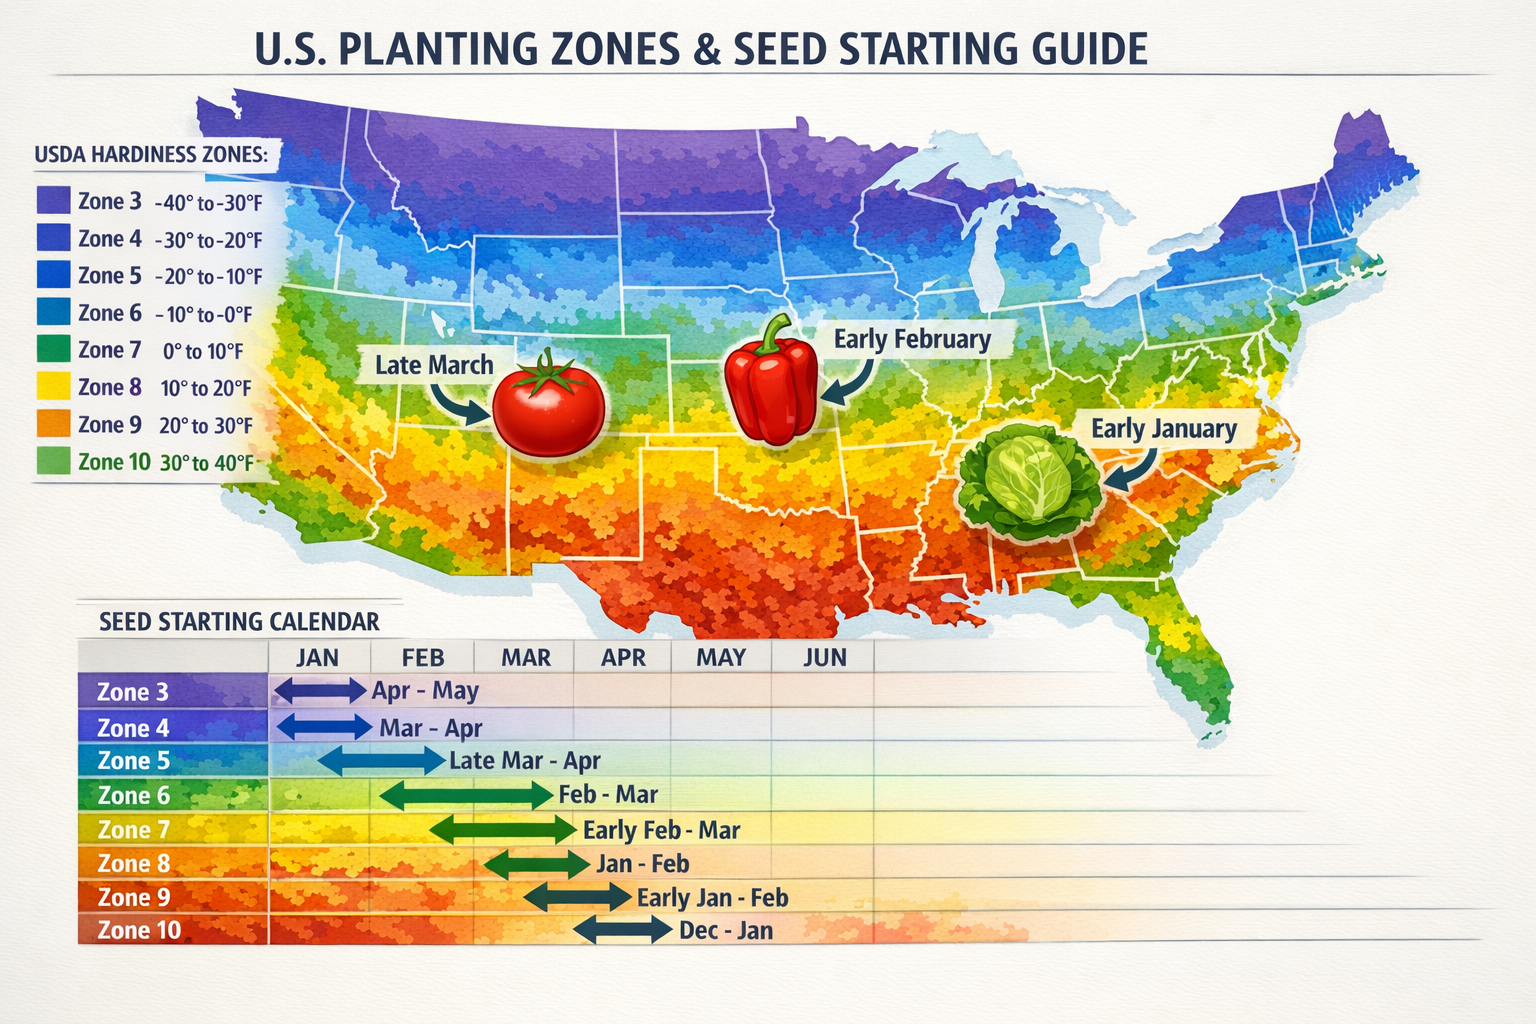
Understanding Your Growing Zone for Seed Starting Success
Your USDA hardiness zone provides a starting point, but it’s not the complete picture when planning your seed starting schedule. I’ve learned that even gardeners in the same zone can have last frost dates that differ by 2-3 weeks depending on their specific location, elevation, and local microclimates[1].
The key is finding your area’s average last frost date – not just the zone number. This date becomes your anchor point for calculating when to start each type of seed indoors. For example, if your average last frost is April 15th, you’ll count backward from there to determine your optimal seed starting windows.
Here’s how zones typically break down for last frost dates:
- Zones 3-4: Mid to late May
- Zones 5-6: Mid-April to early May
- Zones 7-8: Early to mid-April
- Zones 9-10: Late February to early March
Remember, these are general guidelines. Your local extension office or weather service can provide the most accurate last frost date for your specific area.
Zone-Based Seed Starting Calendar: When to Plant What
Each zone requires a tailored approach to seed starting timing. Here’s my zone-by-zone breakdown that I’ve developed through years of gardening experience and research.
Zones 3-4 (Northern Regions)
Last Frost: Mid to Late May
- Early March: Start slow-growing warm-season crops like peppers and eggplant indoors
- Late March: Begin tomatoes, herbs, and annual flowers indoors
- Early April: Start quick-growing warm crops like basil and cucumbers
- Mid-April: Direct sow cool-season crops like peas and spinach outdoors when soil reaches 45°F[2]
Zones 5-6 (Midwest and Northeast)
Last Frost: Mid-April to Early May
- Late February: Start peppers, eggplant, and slow herbs like oregano
- Early March: Begin tomatoes, annual flowers, and most herbs indoors[5]
- Mid-March: Start cucumbers, squash, and quick-growing warm crops
- Early April: Direct sow cool crops outdoors; continue succession planting indoors
Zones 7-8 (Southeast and Lower Midwest)
Last Frost: Early to Mid-April
- Early February: Start peppers, eggplant, and heat-loving herbs
- Mid-February: Begin tomatoes, basil, and warm-season annuals[5]
- Early March: Start cucumbers, beans, and quick warm crops
- Late February: Direct sow cool-season vegetables outdoors when soil is workable[2]
Zones 9-10 (South and Southwest)
Last Frost: Late February to Early March
- January: Start most warm-season crops indoors, including tomatoes and peppers[5]
- Late January: Begin heat-loving herbs and annual flowers
- February: Start quick-growing warm crops; direct sow cool crops outdoors
- Year-round: Many vegetables can be grown continuously with succession planting
Choose your zone’s timeline, but always verify with your local last frost date for the most accurate timing.
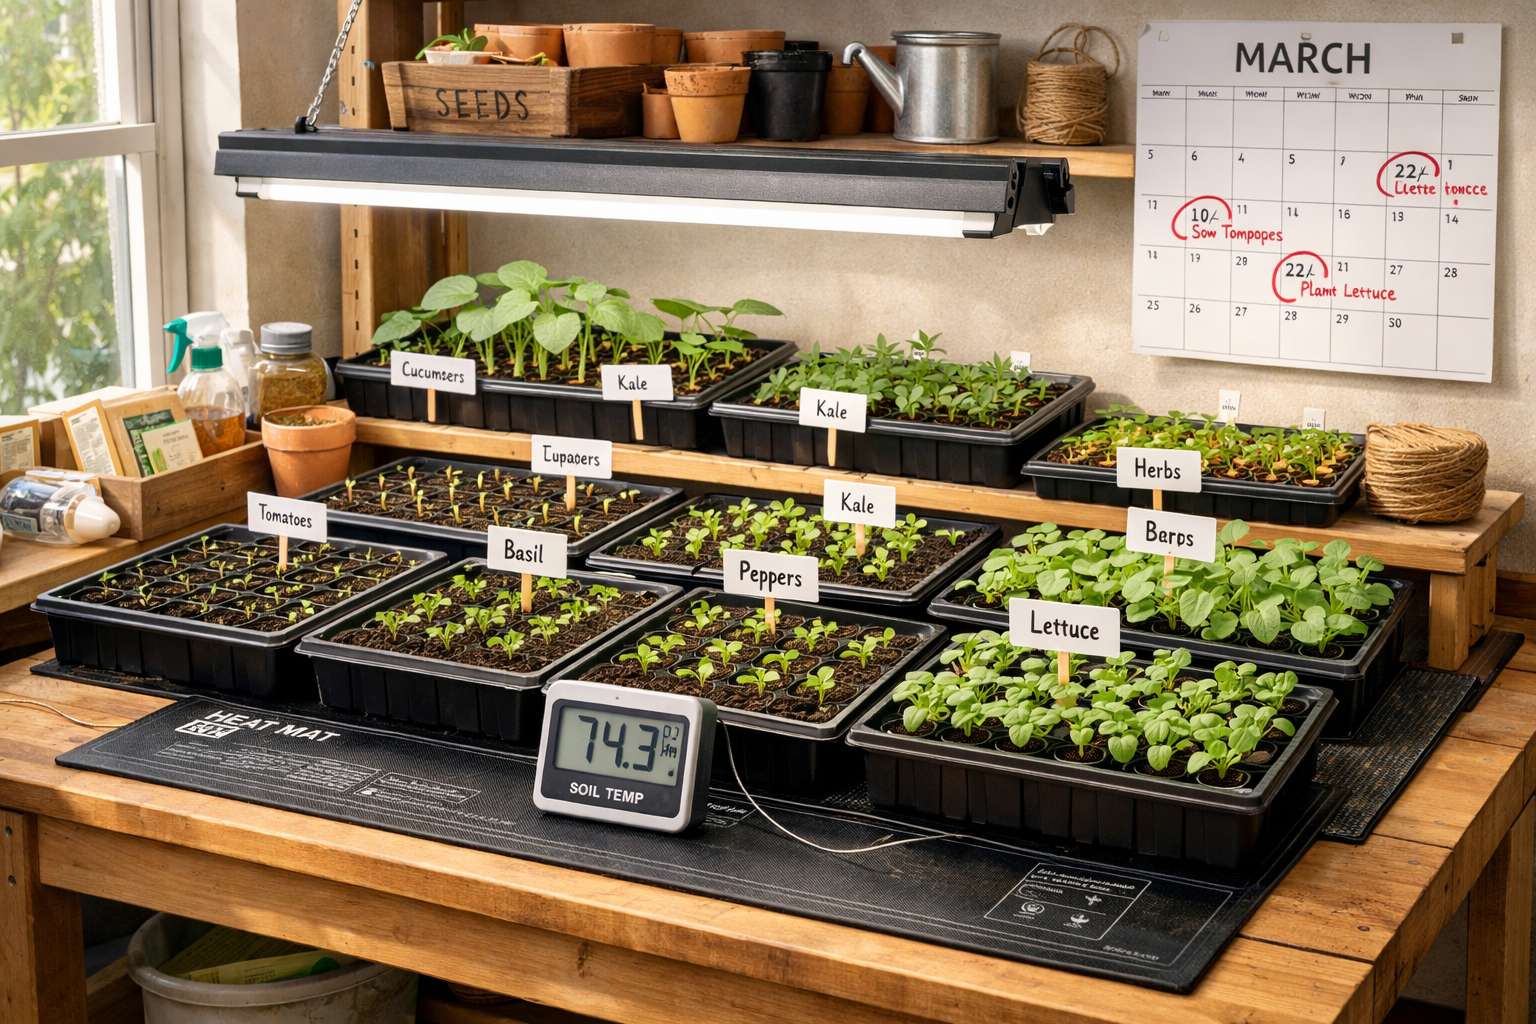
Essential Seed Starting Supplies for Indoor Success
Creating the right environment for seed germination requires more than just pots and soil. After years of trial and error, I’ve found that having the proper seed starting station setup makes all the difference in achieving consistent germination and healthy seedlings.
Must-Have Supplies:
- Seed starting trays with drainage holes
- High-quality seed starting mix (not regular potting soil)
- Heat mat or warm location for consistent soil temperature
- Grow lights or very bright south-facing window
- Plant labels and waterproof marker
- Spray bottle for gentle watering
Pro tip: Seeds need more warmth to germinate than established plants need to grow[4]. A heat mat maintaining 70-75°F soil temperature dramatically improves germination rates, especially for warm-season crops.
The lighting situation becomes critical about two weeks after germination when the first true leaves appear. At this point, seedlings need full light as much as or more than warmth[4]. If you’re relying on windowsill light, be prepared to move seedlings to your brightest location or invest in supplemental grow lights.
For container gardeners working with limited space, I recommend starting with our guide to container garden seeds to choose varieties that thrive in pots and small spaces.
Warm-Season vs Cool-Season Crops: Timing the Difference
Understanding the fundamental difference between warm and cool-season crops is crucial for successful seed starting timing. This knowledge has saved me from countless gardening disappointments over the years.
Warm-Season Crops (Start 6-10 weeks before last frost):
- Tomatoes: 6-8 weeks before last frost
- Peppers: 8-10 weeks before last frost
- Eggplant: 8-10 weeks before last frost
- Basil: 6-8 weeks before last frost
- Cucumbers: 4-6 weeks before last frost
- Squash and melons: 4-6 weeks before last frost
These crops are sensitive to cold and won’t tolerate any frost. They also need warm soil (60°F+) to thrive after transplanting.
Cool-Season Crops (Start 4-8 weeks before last frost):
- Lettuce: 4-6 weeks before last frost
- Spinach: 4-6 weeks before last frost
- Broccoli: 6-8 weeks before last frost
- Cabbage: 6-8 weeks before last frost
- Kale: 4-6 weeks before last frost
- Peas: Can direct sow 4-6 weeks before last frost
Cool-season crops actually prefer cooler weather and can tolerate light frosts. Many can be direct seeded outdoors earlier than their warm-season counterparts.
Common mistake I see: Starting warm-season crops too early. Those gorgeous tomato seedlings started in January might seem impressive, but if you can’t transplant them until May, they’ll become leggy and stressed from being pot-bound.
Step-by-Step Seed Starting Process
Here’s my proven method for starting seeds indoors, refined through years of nurturing seedlings from tiny seeds to thriving transplants.
Week 1: Germination Setup
- Fill seed trays with moistened seed starting mix
- Plant seeds at proper depth – generally 2-3 times the seed width[3]
- Label everything with variety and date
- Place on heat mat or warm location (70-75°F)
- Cover with humidity dome or plastic wrap
- Keep soil consistently moist but not waterlogged
Week 2-3: First Growth
- Remove covers once seeds germinate
- Move to bright light – this is crucial for preventing leggy growth[4]
- Reduce temperature slightly (65-70°F)
- Water from bottom when soil surface feels dry
- Watch for first true leaves (not the initial seed leaves)
Week 4-6: Strengthening
- Transplant to larger containers if needed
- Begin weekly diluted fertilizer (quarter strength)
- Start hardening off process 1-2 weeks before transplant date
- Gradually introduce outdoor conditions for 7-10 days
Week 6-10: Transplant Ready
- Check weather forecast for stable temperatures
- Prepare garden beds or containers
- Transplant on cloudy day or in evening
- Water thoroughly and monitor closely for first week
The key to success lies in understanding that decoding seed packets provides specific timing and depth information for each variety you’re growing.
Common Seed Starting Mistakes and How to Avoid Them
After years of helping fellow garden enthusiasts troubleshoot their seed starting challenges, I’ve identified the most common pitfalls that can derail your indoor growing success.
Starting Too Early or Too Late
The biggest mistake I see is not calculating timing based on your specific last frost date. Starting tomatoes 12 weeks early might seem ambitious, but those seedlings will become root-bound and stressed. Conversely, starting warm-season crops too late leaves you scrambling to find transplants at the garden center.
Insufficient Light
Even the brightest windowsill rarely provides enough light for healthy seedling development. Leggy, stretched seedlings are almost always a lighting issue. After two weeks, seedlings need 12-14 hours of bright light daily[4].
Overwatering
More seedlings die from too much water than too little. I’ve learned to water from the bottom and let the soil surface dry slightly between waterings. Soggy soil leads to damping-off disease, which kills seedlings at soil level.
Wrong Soil Choice
Regular potting soil is too heavy for seeds. Seed starting mix is finer, drains better, and provides the right environment for germination. It’s worth the investment for better success rates.
Skipping the Hardening Off Process
Transplanting seedlings directly from indoor conditions to the garden is like throwing them into shock. Gradually exposing them to outdoor conditions over 7-10 days prevents transplant shock and strengthens plants.
Not Reading Seed Packets
Each variety has specific requirements for depth, spacing, and timing. I always keep my seed packets handy for reference throughout the growing process.
Troubleshooting Your Indoor Seed Starting
Even with careful planning, challenges can arise during the seed starting process. Here are the most common issues I’ve encountered and my solutions for getting back on track.
Seeds Not Germinating
Check soil temperature first – most seeds need consistent warmth to germinate. Old seeds lose viability, so test germination rates by placing 10 seeds on a damp paper towel. If fewer than 7 germinate in the expected timeframe, it’s time for fresh seeds.
Leggy, Stretched Seedlings
This almost always indicates insufficient light. Move seedlings to your brightest location or add supplemental grow lights. You can also gently bury leggy stems deeper when transplanting to stronger containers.
Seedlings Falling Over (Damping-Off)
This fungal disease thrives in overly wet conditions. Improve air circulation with a small fan, reduce watering frequency, and ensure good drainage. Remove affected seedlings immediately to prevent spread.
Slow Growth After Germination
Cool temperatures often slow seedling development. Most seedlings prefer 65-70°F during the day. Also, begin light fertilizing with diluted liquid fertilizer once true leaves appear.
Yellowing Leaves
This can indicate overwatering, underfeeding, or natural aging of seed leaves (cotyledons). If true leaves are green and healthy, yellowing seed leaves are normal.
For container gardeners dealing with limited space, consider focusing on vegetables that grow well in containers to maximize your success rate.
Frequently Asked Questions
Q: Can I start seeds too early?
A: Yes, starting seeds too early leads to root-bound, leggy plants that struggle after transplanting. Calculate timing based on your last frost date and work backward according to each crop’s specific needs.
Q: Do I need grow lights or will a sunny window work?
A: While a south-facing window can work for germination, most seedlings need supplemental lighting after two weeks for optimal growth. Grow lights provide consistent, adequate light regardless of weather.
Q: How do I know when my seedlings are ready to transplant?
A: Seedlings are ready when they have 2-4 sets of true leaves, strong stems, and have been properly hardened off. Soil temperature should be appropriate for the specific crop.
Q: Can I use regular potting soil for starting seeds?
A: Seed starting mix is preferred because it’s finer, drains better, and provides optimal conditions for germination. Regular potting soil can work but may lead to lower germination rates.
Q: What’s the ideal soil temperature for seed germination?
A: Most seeds germinate best at 70-75°F soil temperature. Warm-season crops like peppers prefer the higher end, while cool-season crops can germinate at slightly lower temperatures.
Q: How often should I water my seedlings?
A: Water when the soil surface feels dry to the touch, usually every 2-3 days. Water from the bottom when possible and avoid keeping soil constantly wet.
Q: Should I fertilize my seedlings?
A: Begin light fertilizing with quarter-strength liquid fertilizer once true leaves appear, usually around week 3-4. Seed starting mix typically has enough nutrients for initial growth.
Q: What’s hardening off and why is it important?
A: Hardening off gradually acclimates indoor seedlings to outdoor conditions over 7-10 days. This process prevents transplant shock and strengthens plants for garden life.
Q: Can I start different vegetables in the same tray?
A: It’s better to separate crops with different germination times and growing requirements. This allows you to provide optimal care for each type of plant.
Q: How do I prevent my seedlings from getting leggy?
A: Provide adequate light (12-14 hours daily), maintain proper temperature (not too warm), and ensure good air circulation. Brush seedlings gently daily to encourage stronger stems.
Q: When should I transplant seedlings to larger pots?
A: Transplant when roots begin showing at drainage holes or when plants have 2-3 sets of true leaves, usually 3-4 weeks after germination.
Q: Can I reuse seed starting trays and soil?
A: Clean trays thoroughly with diluted bleach solution between uses. Fresh seed starting mix is recommended each season to prevent disease and ensure optimal nutrition.
Key Takeaways for Seed Starting Success
• Your specific last frost date matters more than your zone number – research your local average and plan accordingly
• Different crops need different timing – warm-season vegetables require 6-10 weeks indoors while cool-season crops need only 4-6 weeks
• Proper equipment makes the difference – invest in heat mats, good lighting, and quality seed starting mix for consistent results
• Light becomes critical after germination – plan for 12-14 hours of bright light daily once seedlings emerge
• Hardening off prevents transplant shock – gradually introduce outdoor conditions over 7-10 days before transplanting
• Timing calculations work backward from transplant date – count back from your last frost date plus any additional waiting period for soil warmth
• Start small and expand your skills – begin with easy crops like lettuce and tomatoes before tackling more challenging varieties
• Keep detailed records – track what works in your specific location and conditions for future seasons
Conclusion
Starting seeds indoors using a zone-based guide transforms gardening from guesswork into a systematic approach that yields reliable results. I’ve found that understanding your specific location’s timing, combined with proper equipment and techniques, creates the foundation for a thriving garden that begins long before spring arrives.
The joy of nurturing nature starts with those first tiny seeds sprouting in your indoor setup. Whether you’re working with a sunny windowsill in a small apartment or a dedicated seed starting station, the principles remain the same: calculate timing based on your last frost date, provide adequate warmth and light, and gradually prepare your seedlings for their outdoor home.
Remember, every expert gardener started as a beginner. Start with a few easy varieties this season, keep notes on what works in your specific conditions, and gradually expand your seed starting skills. Your future self will thank you when you’re harvesting homegrown tomatoes in July that you started from seed in March.
For those ready to dive deeper into container growing, explore our comprehensive guide to container gardening for beginners to maximize your small-space growing success or The Complete Beginner’s Guide to Starting Seeds Indoors.
Your next steps: Find your area’s average last frost date, choose 2-3 crops to start with, gather your supplies, and mark your calendar. The path to garden abundance begins with a single seed and the wisdom to plant it at just the right time.
References
[1] Watch – https://www.youtube.com/watch?v=9q6__Eco4_Y
[2] What To Do In The Garden In 2026 Month By Month Checklist – https://www.gardenary.com/blog/what-to-do-in-the-garden-in-2026-month-by-month-checklist
[3] Watch – https://www.youtube.com/watch?v=UtbonBgnEd4
[4] Sowing Timeline – https://charlesdowding.co.uk/blogs/no-dig-resources/sowing-timeline
[5] Gardening – https://www.farmersalmanac.com/calendar/gardening

0 Comments